
CHATTERBOX QUILTS’ BLOG
Helping Quilters Learn and Improve

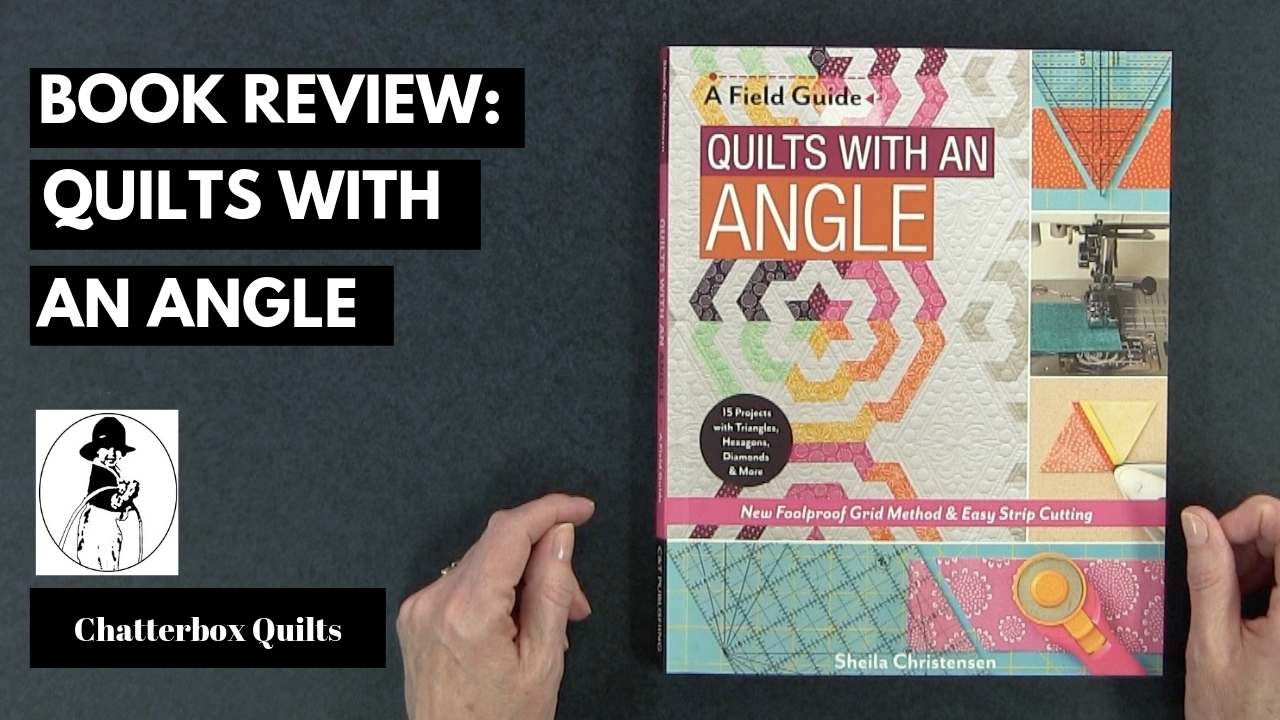
Book Review: Quilts With An Angle
If you are hesitant about stitching up blocks with 60 degree angles in them, you’ll want to take a look at Quilts with an Angle – a Field Guide by Sheila Christensen and published by C & T Publishing.

Photo courtesy of C & T Publishing
This is an in-depth look at how to create these types of blocks successfully. Quilts with an Angle not only explains how to stitch up blocks with different geometric shapes, all with 60 degree angles, but also talks about the tools you can use to get these degrees.
The book is divided into different sections, with a specific geometric shape, in each section. There are triangles, trapezoids, hexagons (so many quilters love these!), diamonds, and more!
I’ve got to admit that I haven’t made a quilt with 60 degree angles. They just seem to intimidating to me. Quilts with an Angle breaks these 60 degree angle shapes down to the basics and explains in detail how you can successfully create and incorporate them into quilt projects. There are lots of photos in this book to explain the techniques, as well as reference charts to help you.

Photo courtesy of C & T Publishing
Of course, it wouldn’t be much use to learn how to create these blocks without having projects to use them in, would it? No worries, there are projects in each section to demonstrate how you can use those particular shapes in them. By the time you’ve made these projects, you’ll be an expert in cutting a geometric shape with 60 degree angles.

Photo courtesy of C & T Publishing
Click on the image below to see more of Quilts with an Angle – a Field Guide. To get your own copy of Quilts with an Angle, click here.
Do you use 60 degree angles in your projects? Let me know your favourite tool for cutting shapes with 60 degree angles in the Comments below.
Creatively,

P.S. Do you want to improve your quilting skills? Do you want to have fun doing it? Do you want to meet other quilters in a supportive, safe environment? If you answered “yes” to these questions, you need to join The Quilter’s Way. The Quilter’s Way is the only quilting membership site that includes both training and an active, supportive online community. It’s not your grandmother’s quilting circle! Don’t wait another day! Join now.
P.P.S. Did you know that you can sign up to receive emails full of FREE quilting goodness? Click here to receive FREE content directly in your email inbox every few weeks from Chatterbox Quilts. I know you'll be glad you did!
P.S. I am an Amazon affiliate and, if you purchase items by clicking through the links in this post, I will receive a small amount of commission. This doesn’t cost you any more $$$, but helps me to continue creating free content for you. Thanks!

4 Tips on How to Quilt Your Quilt
The biggest problem I hear from quilters when it comes to the quilting part of their project is that they don’t know what motif to put on their quilt. They’re afraid that they’ll “ruin” their quilt, either through lack of skill or poor quilt motif choice. I’m not going to say that you can’t ruin a quilt through poor choices in these areas, but there are 4 considerations that I think will help you to avoid “ruining” your quilt.
The biggest problem I hear from quilters when it comes to the quilting part of their project is that they don’t know what motif to put on their quilt. They’re afraid that they’ll “ruin” their quilt, either through lack of skill or poor quilt motif choice. I’m not going to say that you can’t ruin a quilt through poor choices in these areas, but there are 4 considerations that I think will help you to avoid “ruining” your quilt. (And you can’t really ruin a quilt unless you tear it, stain it, burn it, etc. – everything else is just a learning opportunity).
This is what I like to consider before I choose a quilt motif for my quilt.
1. What is the purpose of the quilt?
This is the first thing I consider before quilting any of my projects.
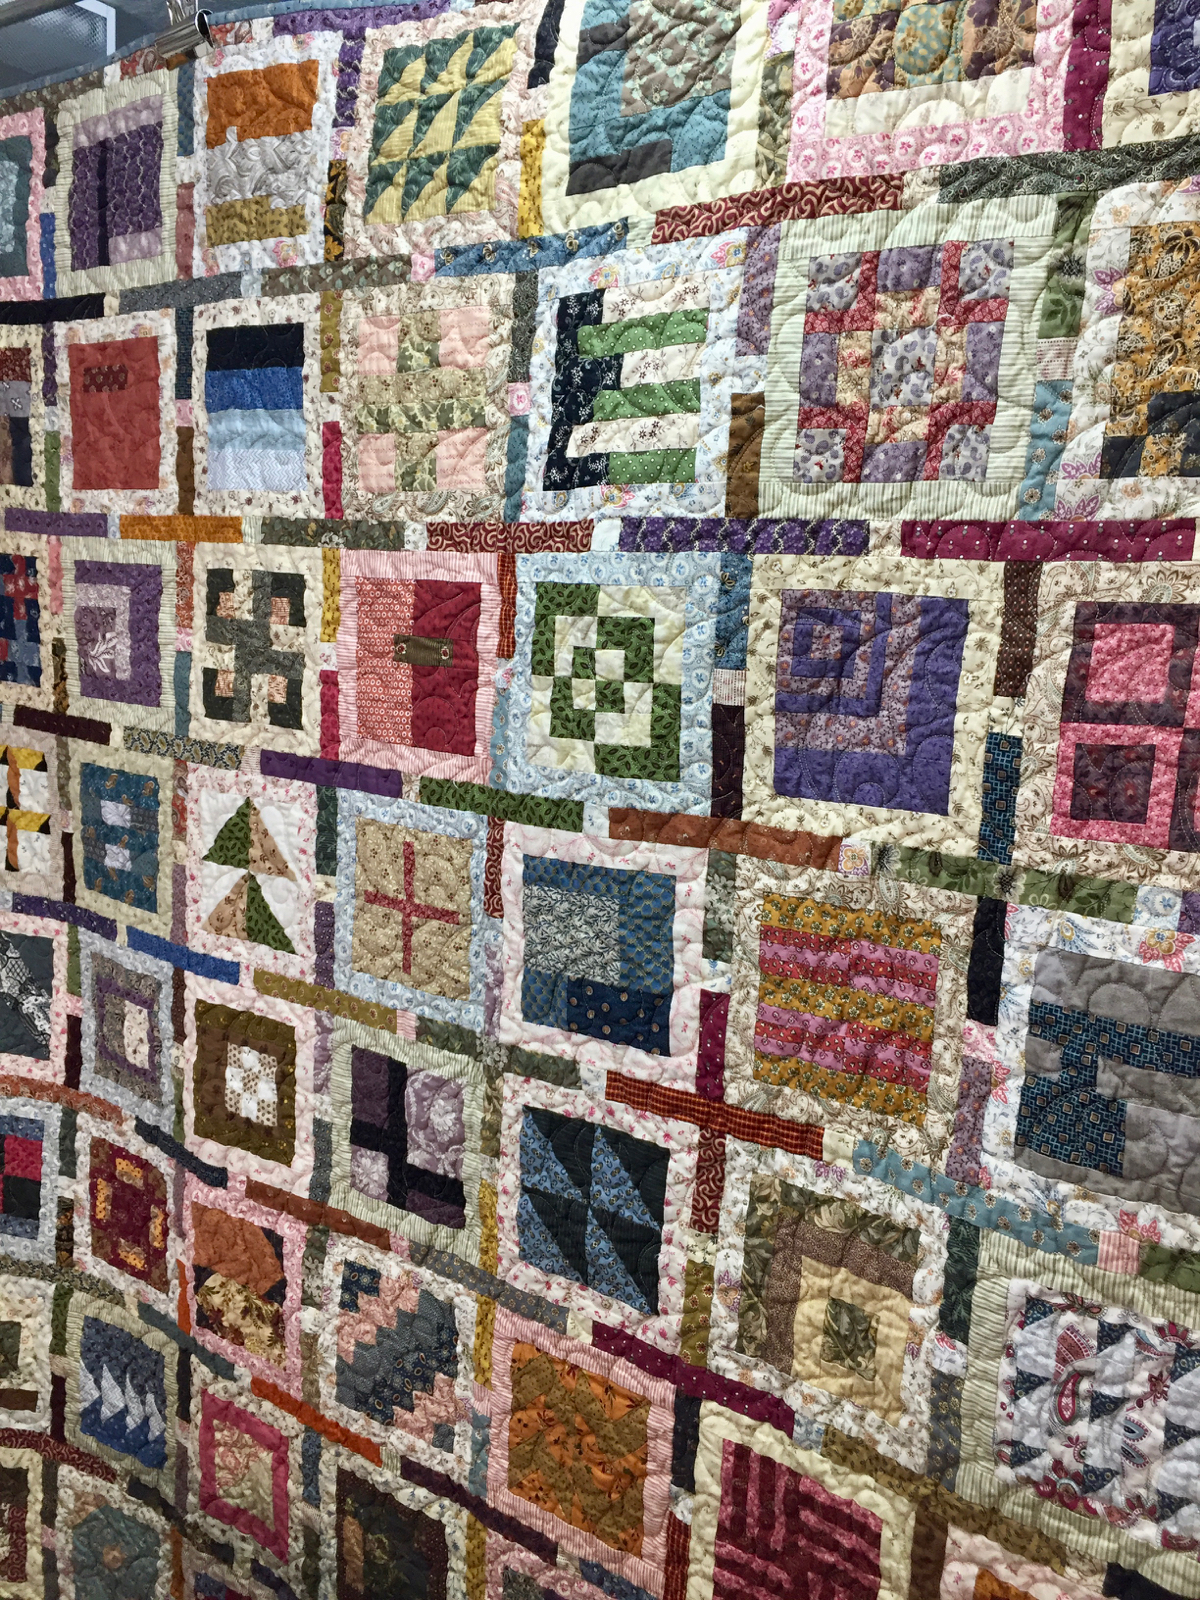
Most quilts we make are ones that we want to be used. They may be baby quilts to be dragged around the house, a lap quilt to be snuggled under when reading, or a bed quilt to keep us warm at night. These types of quilts will be used and washed repeatedly – they’re what I call “utility” quilts. These types of quilts don’t merit custom quilting. A simple pantograph or all-over design will work perfectly well for the majority of these types of quilts. Pick a quilt motif that compliments the fabric or design of the quilt and get ‘er done.

Pattern is Chock a Block by Chatterbox Quilts
If the quilt top you have created is intricately pieced, it may merit custom quilting. If you would consider this an heirloom quilt to be viewed, but not used, custom or semi-custom quilting is the way to go. This might involve smaller, more complex quilting motifs or ruler quilting. You may want to use different quilt motifs in different parts of the quilt. This type of quilting takes more thought and will take longer to complete, but, if the quilt top merits it, this is the way to go.
Decide what type of quilting this particular quilt top needs and you are then ready to move onto the next consideration.
2. What is the focus of the quilt?
When I’m looking at a quilt top, I need to decide what will be the focus or star of it: will it be the piecing or appliqué or will it be the quilting itself?
For appliqué quilts, you definitely want to emphasize the appliqué itself. The quilting should enhance or accentuate the appliqué, not compete with it. In this case, the appliqué is the star, and the quilting is the supporting actor. Keeping your quilting motif simple will work on this type of quilt.

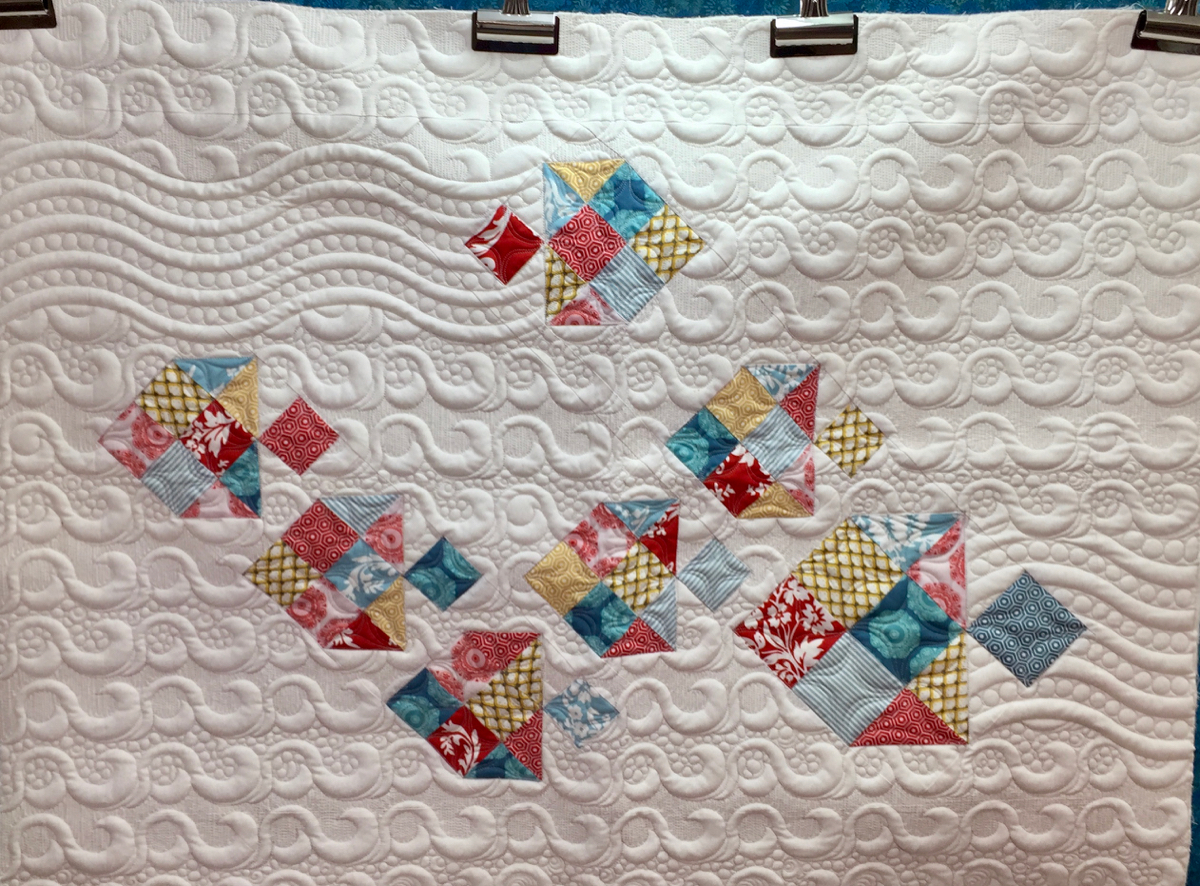
Pattern is from Community Quilt Along by Chatterbox Quilts & QuiltFusion
If, on the other hand, this is a pieced quilt with lots of negative space, for example, a modern quilt, the star will be the quilting. You’ll be able to do lots of custom or semi-custom quilting in the negative space on these types of quilt. The sky is the limit here, so have fun and combine multiple quilting motifs to show off your skill.
Which brings us to the next consideration.
3. What is your skill level?
I always say that it is better to do a simple design well than a complex design poorly. (I should have this tattooed on me!).
If you struggle to do feathers or don’t like how yours look, don’t do feathers on your quilts! If you are a master at stippling, use this on your quilts. Simple designs can look just as good as more complex ones if done well.

Don’t think you have to do a certain quilt motif because you see it on many quilts. If you can’t do it well (yet!), stick to the designs that you have mastered. There will be lots more quilt tops just waiting for those feathers when you have mastered them.
The next thing to consider is…
4. What is the style of the quilt?
Some quilt motifs are more appropriate on certain styles of quilts. I’m not saying that this is a rule (are there really rules in quilting?!), but it’s something to consider.
Is your quilt a traditional or modern quilt? You may want to use more traditional quilting motifs, such as feathers, crosshatching, etc. on a traditional quilt top.
If you have a more modern quilt, simple designs, such as geometric shapes, stippling, or wavy walking foot quilting, might be more appropriate.
All of these considerations are suggestions only as everyone has their own ideas as to what type of quilting they want to have on their own quilt tops, but they are a starting point to help you in making this decision.
In all cases, remember that if your quilt has busy fabrics, you won’t see the quilting well, so your beautiful custom quilting won’t be seen. If you choose to put this amount of effort into quilting a quilt with busy fabrics, don’t be disappointed when the quilting doesn’t show. The reverse is true: you will definitely see the quilting on solid fabrics, so go for that custom work.
In general, I like to use curved quilting motifs on quilt tops that have straight lines in them and straight line quilting motifs on quilt tops that have curved piecing in them. Use the opposite type of quilting motif to the quilt top to work harmoniously together.
For more information on choosing a quilt motif, click on the image below.

These are some ideas you can use when considering the quilt motif to be used in your next quilt project. What are the things you consider when choosing a quilt motif for your quilts? Leave a comment below to let me know.
Creatively,
Download the free Get Out of the Ditch! guide to learn how to start free motion quilting by clicking here.
P.S. Are you serious about improving your quilting? Do you want to connect with other committed quilters in a supportive, safe environment? If you answered “yes” to these questions, you need to join The Quilter’s Way. The Quilter’s Way is the only quilting membership site that includes both training and an active, supportive online community. Don’t wait another day! Join now.
P.P.S. Did you know that you can sign up to receive emails full of FREE quilting goodness? Click here to receive FREE content directly in your email inbox every few weeks from Chatterbox Quilts. I know you'll be glad you did!
P.S. I am an Amazon affiliate and, if you purchase items by clicking through the links in this post, I will receive a small amount of commission. This doesn’t cost you any more $$$, but helps me to continue creating free content for you. Thanks!

Learning From Gammill Quilt Artist, Sharon Blackmore
I recently had the opportunity to interview Gammill Quilt Artist and long arm quilter extraordinaire, Sharon Blackmore of Love Shack Quilts, Sharon is a local long arm quilter, specializing in custom quilting, and is the host of the Prairie Quilt Militia and How do I Quilt This? Facebook group.

Sharon has been free motion quilting for about 20 years and long arm quilting (always on a Gammill) for about 12 of those years. Her secret to her amazing quilting is that she quilts every day. Yes, practice definitely makes progress towards perfection!
Sharon loves to challenge herself and this is also how she has improved her skills over the years. She believes that it’s important to challenge yourself and try projects outside your comfort zone to improve your quilting skills. Recently she has been quilting on leather and cork and the results are incredible!
As a Gammill Quilt Artist, Sharon has been teaching in Canada and the US on the Quilting with Confidence tour. Sharon loves teaching and appreciates the opportunity to learn from the other Gammill insructors on the tour.
The Rebel, designed and quilted by Sharon Blackmore
Click on the image below to learn more about Sharon and her quilting journey.

After we filmed this interview, Sharon and I recorded several more videos where Sharon shared quilting tips and advice on free motion quilting and went in-depth on how she quilted several of her quilts. These videos are available exclusively for members of The Quilter’s Way. Not yet a member, check it out here.
Click here to learn more about the Prairie Quilt Militia and the How do I Quilt This? groups.
Creatively,
P.S. Are you serious about improving your quilting? Do you want to connect with other committed quilters in a supportive, safe environment? If you answered “yes” to these questions, you need to join The Quilter’s Way. The Quilter’s Way is the only quilting membership site that includes both training and an active, supportive online community. Don’t wait another day! Join now.
P.P.S. Did you know that you can sign up to receive emails full of FREE quilting goodness? Click here to receive FREE content directly in your email inbox every few weeks from Chatterbox Quilts. I know you'll be glad you did!
P.S. I am an Amazon affiliate and, if you purchase items by clicking through the links in this post, I will receive a small amount of commission. This doesn’t cost you any more $$$, but helps me to continue creating free content for you. Thanks!

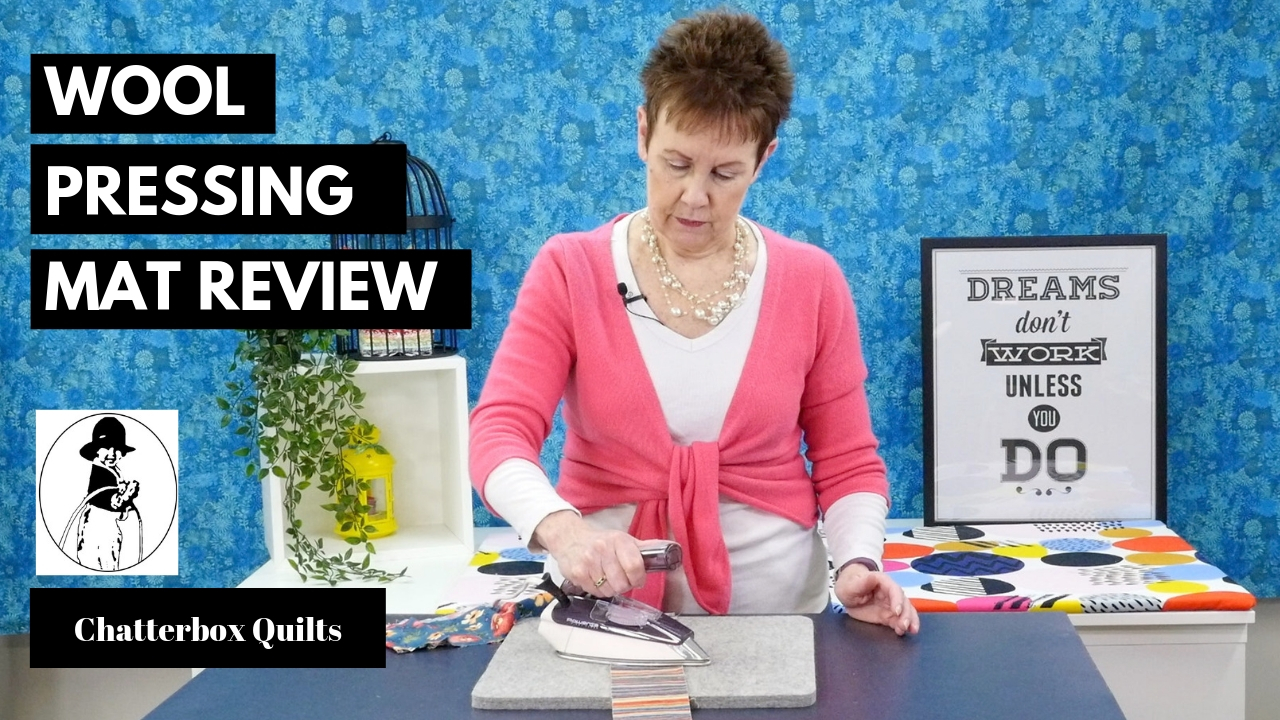
Best Wool Pressing Mat Review
Have you ever tried a wool pressing mat? I hadn’t, but decided it was time to give one a try. I must admit that I was a bit skeptical at first. How could this be any better or different from pressing on my regular pressing surface? Well, I found out that it is a lot better and I want to share this information with you.
Have you ever tried a wool pressing mat? I hadn’t, but decided it was time to give one a try. I received a wool pressing mat from Precision Quilting Tools to try out and I must admit that I was a bit skeptical at first. How could this be any better or different from pressing on my regular pressing surface? Well, I found out that it is a lot better and I want to share this information with you.
A wool pressing mat is thick and is wool all the way through. Both sides are the same so it doesn’t matter which side you are pressing on – it’s like getting two pressing surfaces in one. The Wool Pressing Mat that I tried out was 17” x 17”, but there are various sizes available. This one is the perfect size to have next to your sewing machine or to take on retreats.
Because the Wool Pressing Mat is made of 100% New Zealand wool, it absorbs the heat from the iron and “reflects” it back to the fabric. It’s kind of hard to describe how this works, but the result is that you get a really crisp pressed finish to your fabric and seams without having to press over and over to get this type of finish.
I’ve heard complaints from quilters that a wool pressing mat smells when you use it and I was concerned that this would be the case with this pressing mat from Precision Quilting Tools, but was delighted to find out that this was not the case.
When I first started pressing my fabric on the Wool Pressing Mat, I had my iron set to “Cotton”, but found out that I really didn’t need to use this high of a setting. I turned my iron down to “Wool” and, using the Wool Pressing Mat, it worked just fine. I used both steam and Mary Ellen’s Best Press when pressing in my example. I liked that I could use a lower setting on my iron and still get excellent results – all with no damp wool smell. While I did use steam, this isn’t necessary when using the Wool Pressing Mat – I just wanted to see how it worked when trying out the mat.
One caution when using any type of wool pressing mat is the surface that you use it on. The bottom of the mat isn’t as hot as the top when you are pressing, but it can get quite warm if you are using steam with it (which you really don’t need to do), so I wouldn’t suggest that you use it atop your fine furniture. I would suggest that you just place it on top of your regular pressing surface to avoid any unpleasant and unexpected side effects.
I was very pleased with the results I got when using the Wool Pressing Mat and will now be using it in my quilt studio.
For more information on the Wool Pressing Mat by Precision Quilting Tools, click on the image below.
If you’d like your own Wool Pressing Mat, click here. If you would like to see more of Kim’s favourite tools click here.
Creatively,
Download the free Get Out of the Ditch! guide to learn how to start free motion quilting by clicking here.
P.S. Are you serious about improving your quilting? Do you want to connect with other committed quilters in a supportive, safe environment? If you answered “yes” to these questions, you need to join The Quilter’s Way. The Quilter’s Way is the only quilting membership site that includes both training and an active, supportive online community. Don’t wait another day! Join now.
P.P.S. Did you know that you can sign up to receive emails full of FREE quilting goodness? Click here to receive FREE content directly in your email inbox every few weeks from Chatterbox Quilts. I know you'll be glad you did!
P.S. I am an Amazon affiliate and, if you purchase items by clicking through the links in this post, I will receive a small amount of commission. This doesn’t cost you any more $$$, but helps me to continue creating free content for you. Thanks!

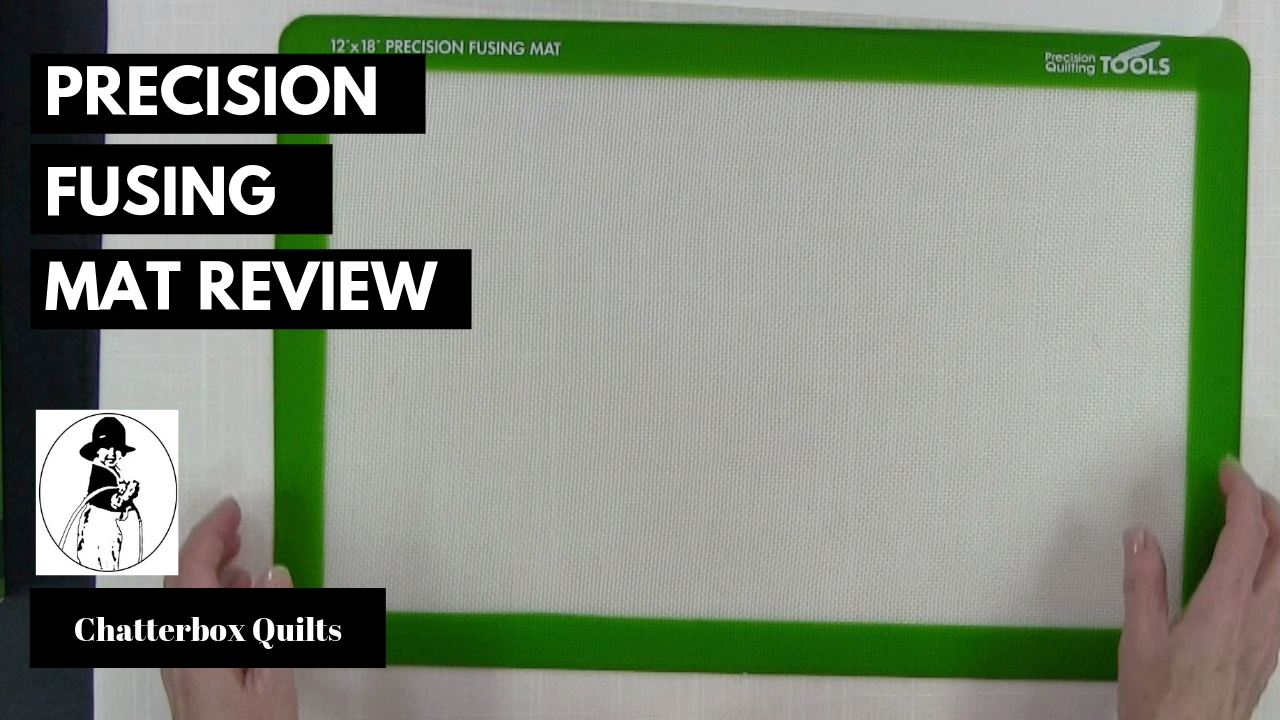
Precision Fusing Mat Review
Raw edge appliqué, or as I call it, fusible web appliqué, is my favourite quilting technique. I’ve been creating projects using this technique for years and am always on the lookout for tools that will make this already easy appliqué method even easier, and I’ve found one: the Precision Fusing Mat from Precision Quilting Tools. This combination of fusing mat and overlay covers all the bases when it comes to creating a fusible web appliqué project. Let’s take a closer look at this amazing product.
When doing fusible web appliqué, you need to trace the appliqué pieces onto the paper side of the fusible web using a lightbox or a window. One of the challenges in doing this is that the fusible web sheet can slide around and make it difficult to get accurate tracing. Enter the Precision Fusing Mat!
One part of this product, the green-edged vinyl mat – I’ll call it “the mat” – goes over your pattern and is non-slip so your paper pattern stays firmly in place underneath it. You then place the fusible web, paper side up, on top of the mat and again, due to the non-slip nature of it, the fusible web doesn’t slide around. This makes for perfectly accurate tracing!
The other use for this is as a teflon overlay - I’ll call it “the sheet” - allows you to layer your appliqué design on top of the sheet. Place your appliqué placement pattern underneath the sheet and you’ll be able to perfectly place and fuse your appliqué pieces on top of the sheet. You can then peel off the fused appliqué shape and fuse it to the background fabric. If I’m working with a multi-piece appliqué design, I like to fuse the pieces together into one unit before placing it on the background. The Precision Fusing Mat allows me to do this easily.
I love the multi-function of the Precision Fusing Mat and know that it’s going to be one of my favourite tools in my quilt studio.
For more information on the Precision Fusing Mat, click on the image below. To get your own Precision Fusing Mat, click here.
Have you tried fusible web appliqué? Do you have any products that work well for you when doing this technique? Share them in the Comments below.
Creatively,
Download the free Get Out of the Ditch! guide to learn how to start free motion quilting by clicking here.
P.S. Are you serious about improving your quilting? Do you want to connect with other committed quilters in a supportive, safe environment? If you answered “yes” to these questions, you need to join The Quilter’s Way. The Quilter’s Way is the only quilting membership site that includes both training and an active, supportive online community. Don’t wait another day! Join now.
P.P.S. Did you know that you can sign up to receive emails full of FREE quilting goodness? Click here to receive FREE content directly in your email inbox every few weeks from Chatterbox Quilts. I know you'll be glad you did!
P.S. I am an Amazon affiliate and, if you purchase items by clicking through the links in this post, I will receive a small amount of commission. This doesn’t cost you any more $$$, but helps me to continue creating free content for you. Thanks!

Welcome! I’m Kim Jamieson-Hirst of Chatterbox Quilts, a YouTube creator and host of The Quilter’s Way. I believe that quilting is more than just a 1/4” seam and that practice makes improvement and you are improving every day!
Contact me at kjh@chatterboxquilts.com.


Want to improve your quilting and have fun doing it? Join The Quilter's Way, a private online membership site that creates successful quilters.

Check out my favourite books and tools.
As an Amazon Associate I earn from qualifying purchases from links that you may find on the Chatterbox Quilts’ website.